
Quick answer: To make an influencer profile brands shortlist, sign up free as a creator, claim a clean profile link and connect Instagram or YouTube for the ✓ Verified badge. Add your real name, city, a one line tagline and a clear face photo, write a bio of at least 50 characters with two or more niches and your languages, publish your first gig with a clear price, and push your Profile Score to 100%.
Brands on InfluencerMetric don't scroll for hours, they filter by niche, city and follower size, open three or four profiles, and shortlist in under a minute. Your profile is your storefront, and this guide walks through building one that gets shortlisted, using real screenshots from the creator dashboard. The same signals get you picked on Instagram's own tool too; see Instagram Creator Marketplace in India.
One thing to know before we start: your profile only appears in brand search once it has a profile photo and a connected social account (or a published gig). That's deliberate, brands only see creators who look ready to work. Everything below gets you past that bar and well beyond it.
Step 1: Create your free account
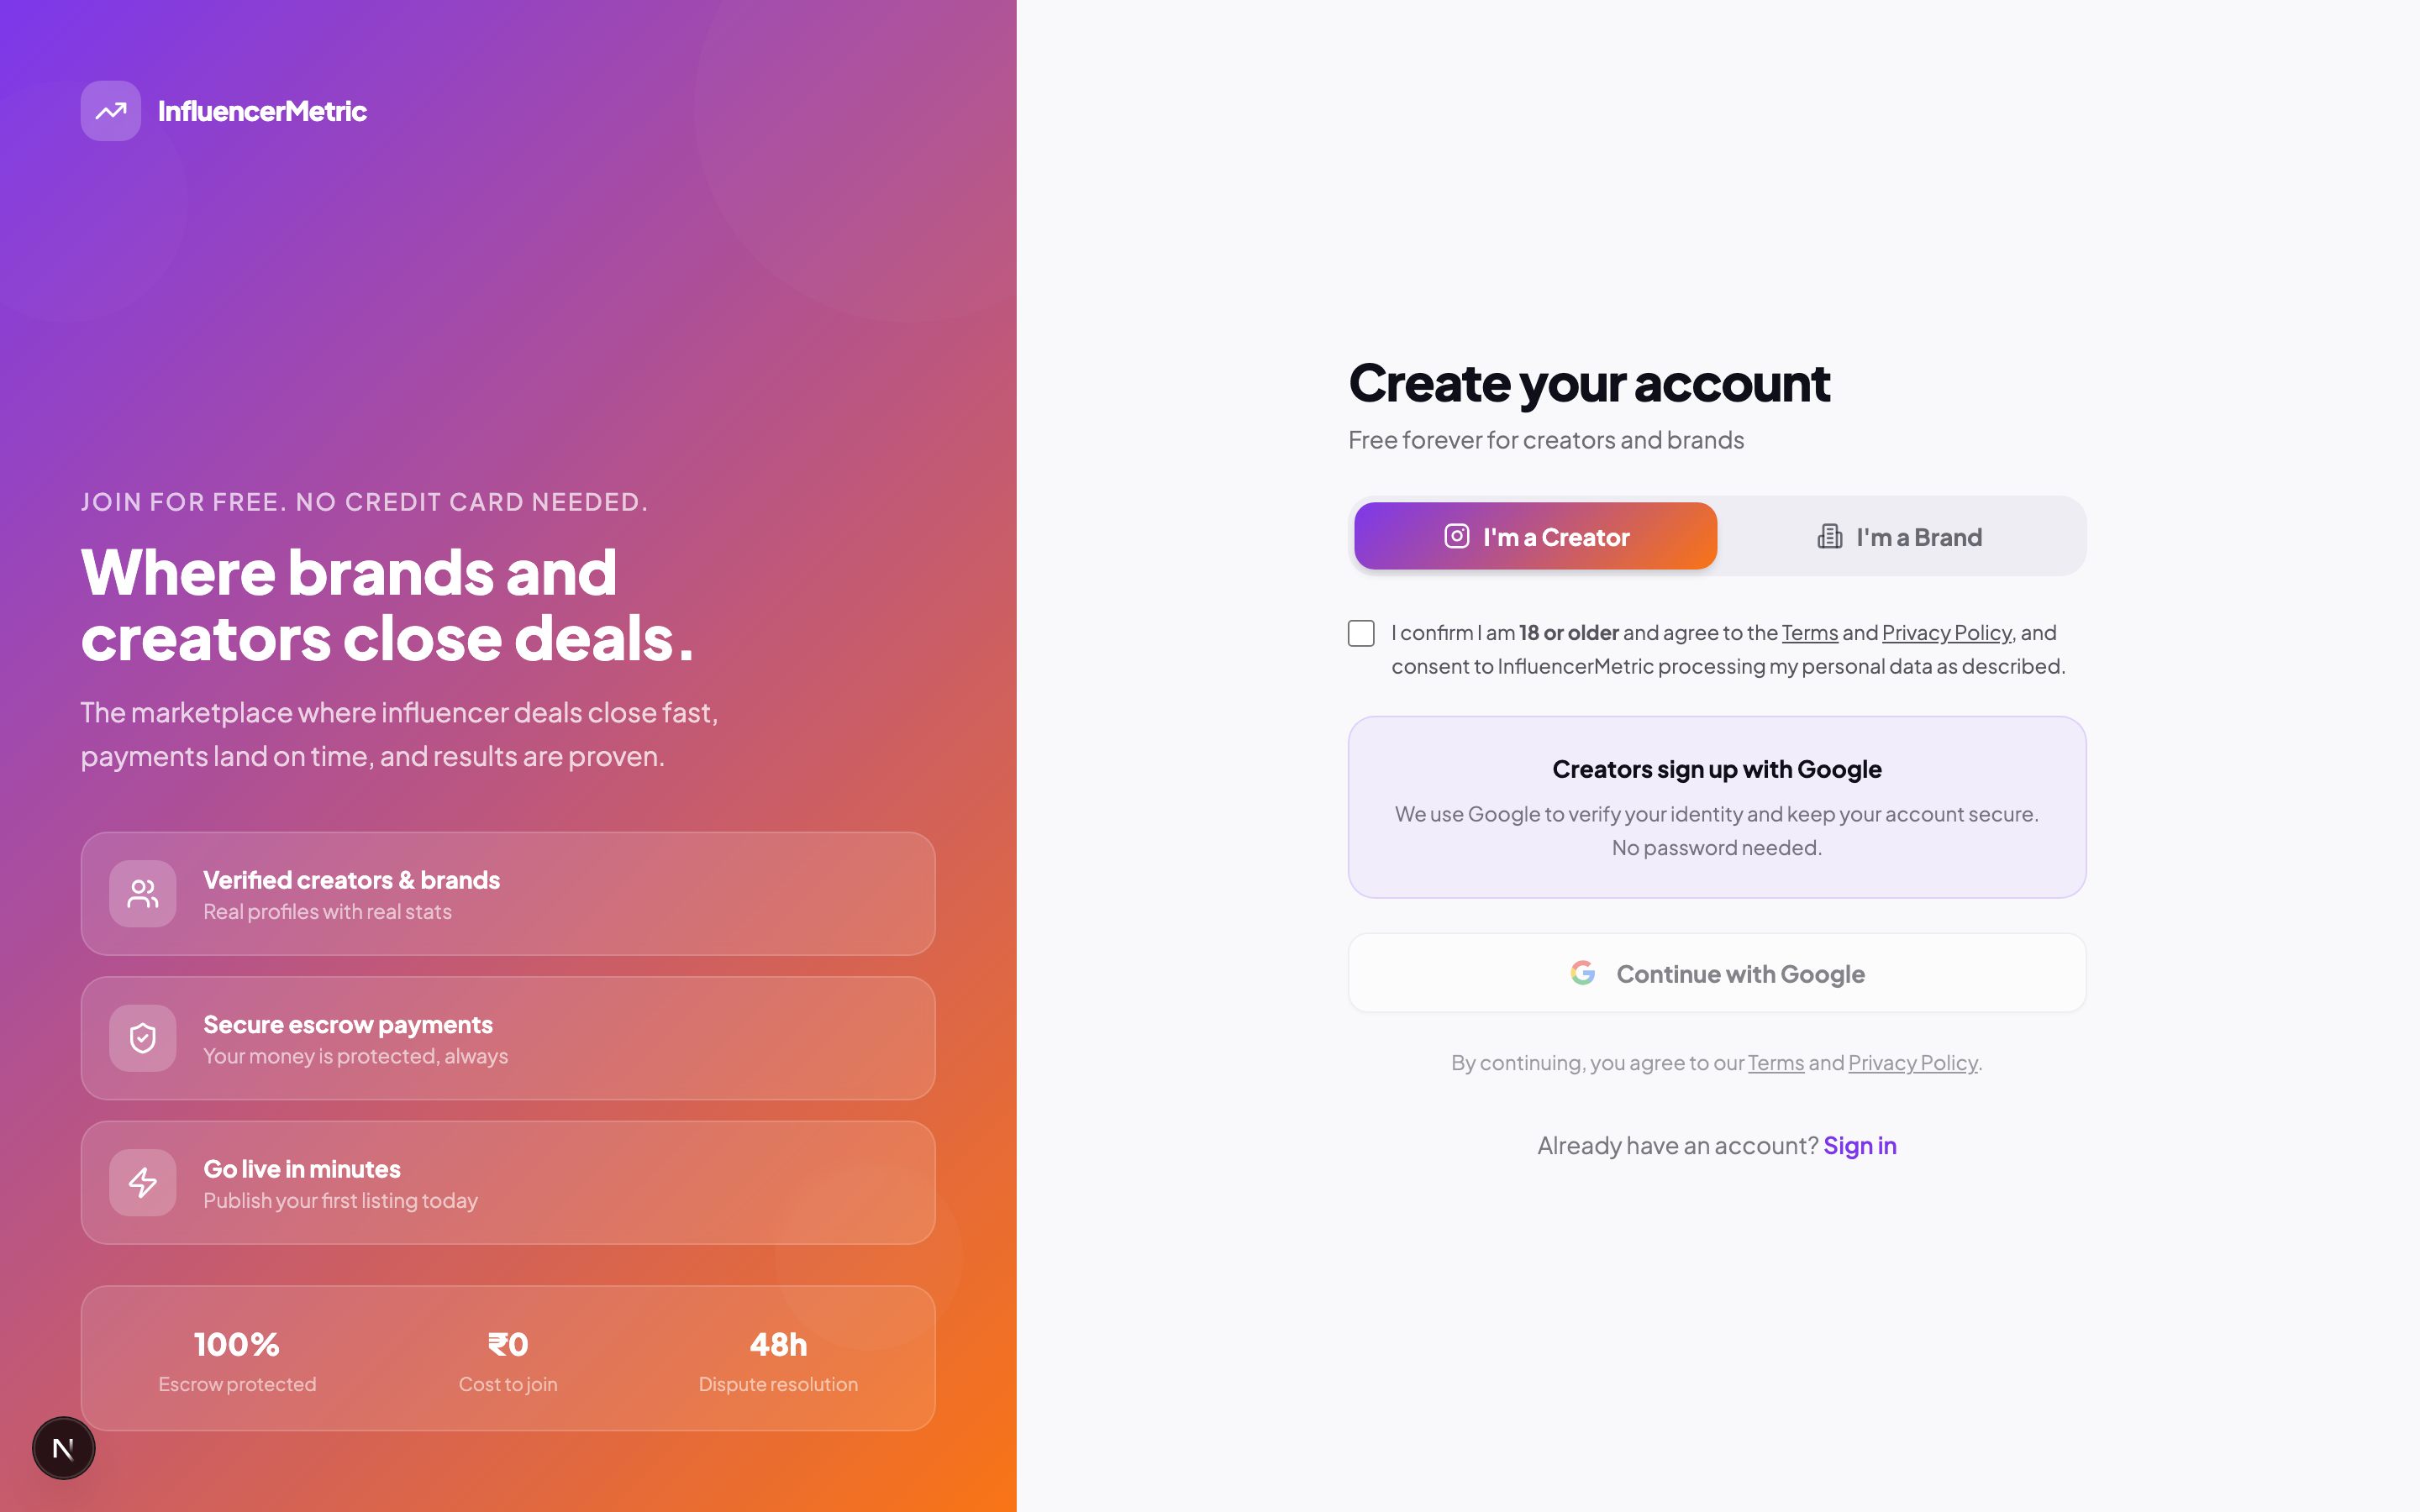
Head to the sign-up page and choose I'm a Creator. Creators sign up with Google, it verifies your identity in one tap and there's no password to remember. You'll confirm you're 18 or older (in line with India's data-protection law) and you're in. No card, no fees: InfluencerMetric only earns a commission when you actually get paid.
Step 2: Take a minute on your dashboard
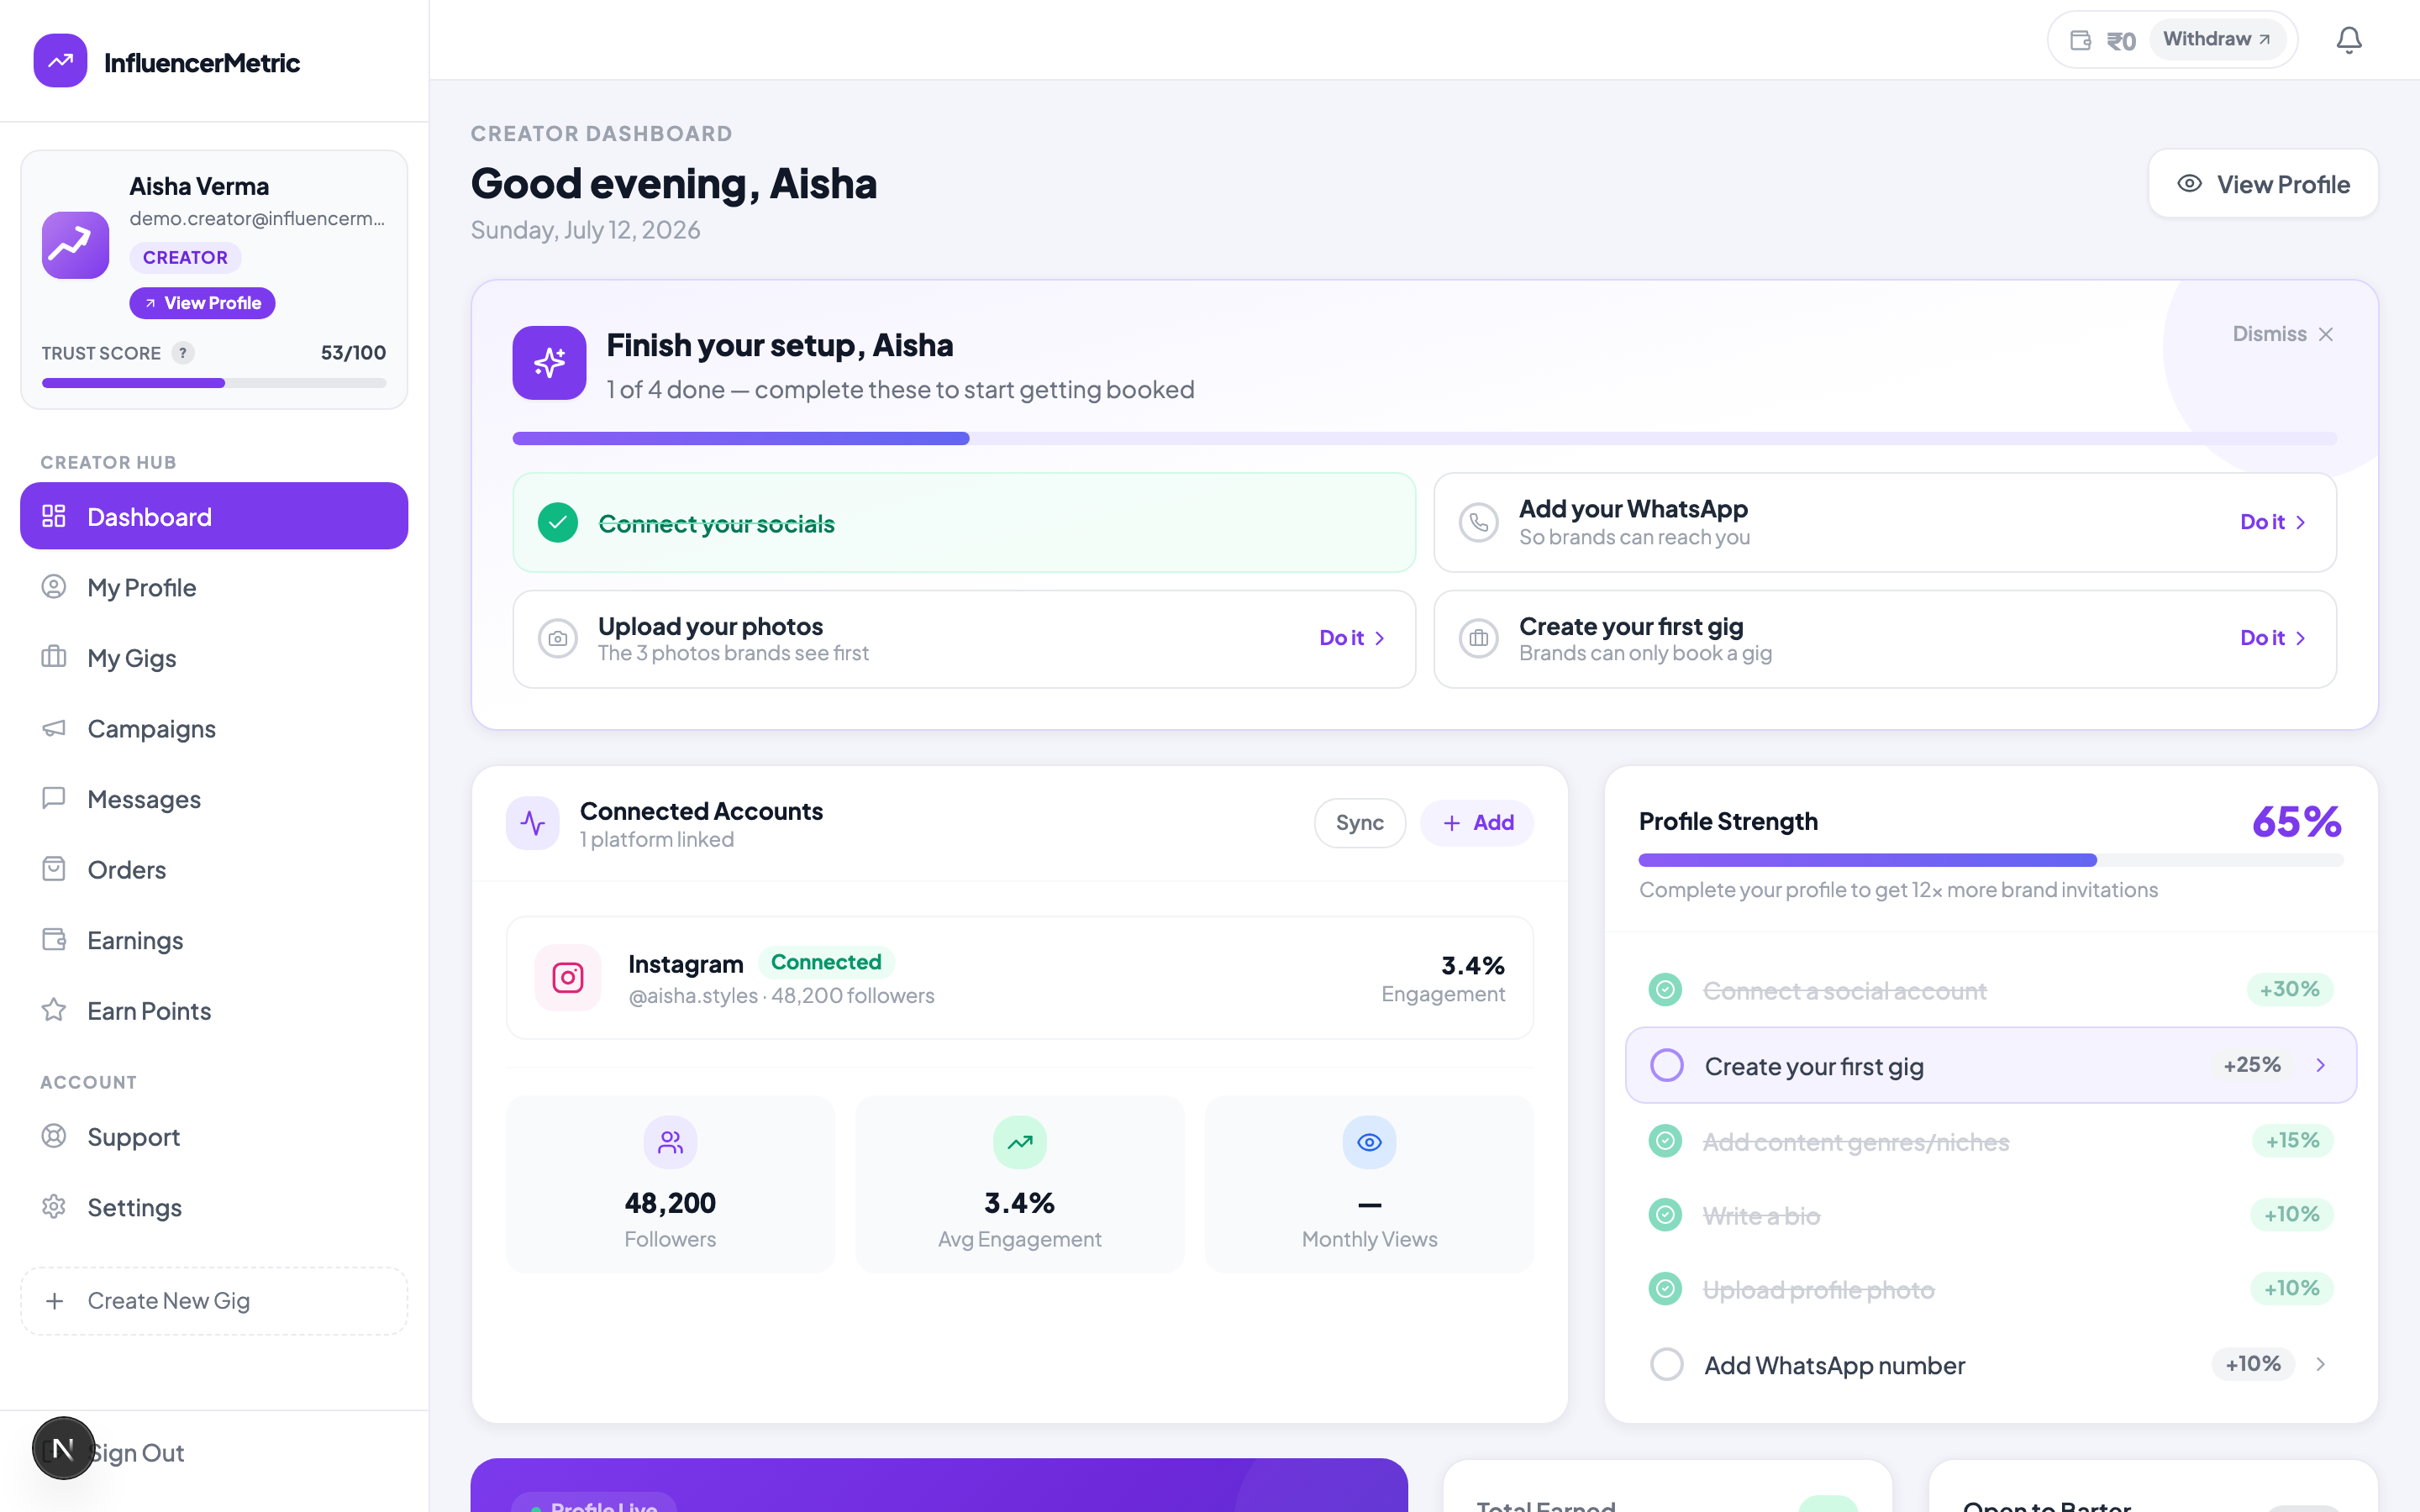
Your dashboard shows your Trust Score, your earnings wallet, and a setup checklist. Don't skip the checklist, each item exists because it changes how often brands open your profile. The rest of this guide follows it in order.
Step 3: Claim your link and connect your socials
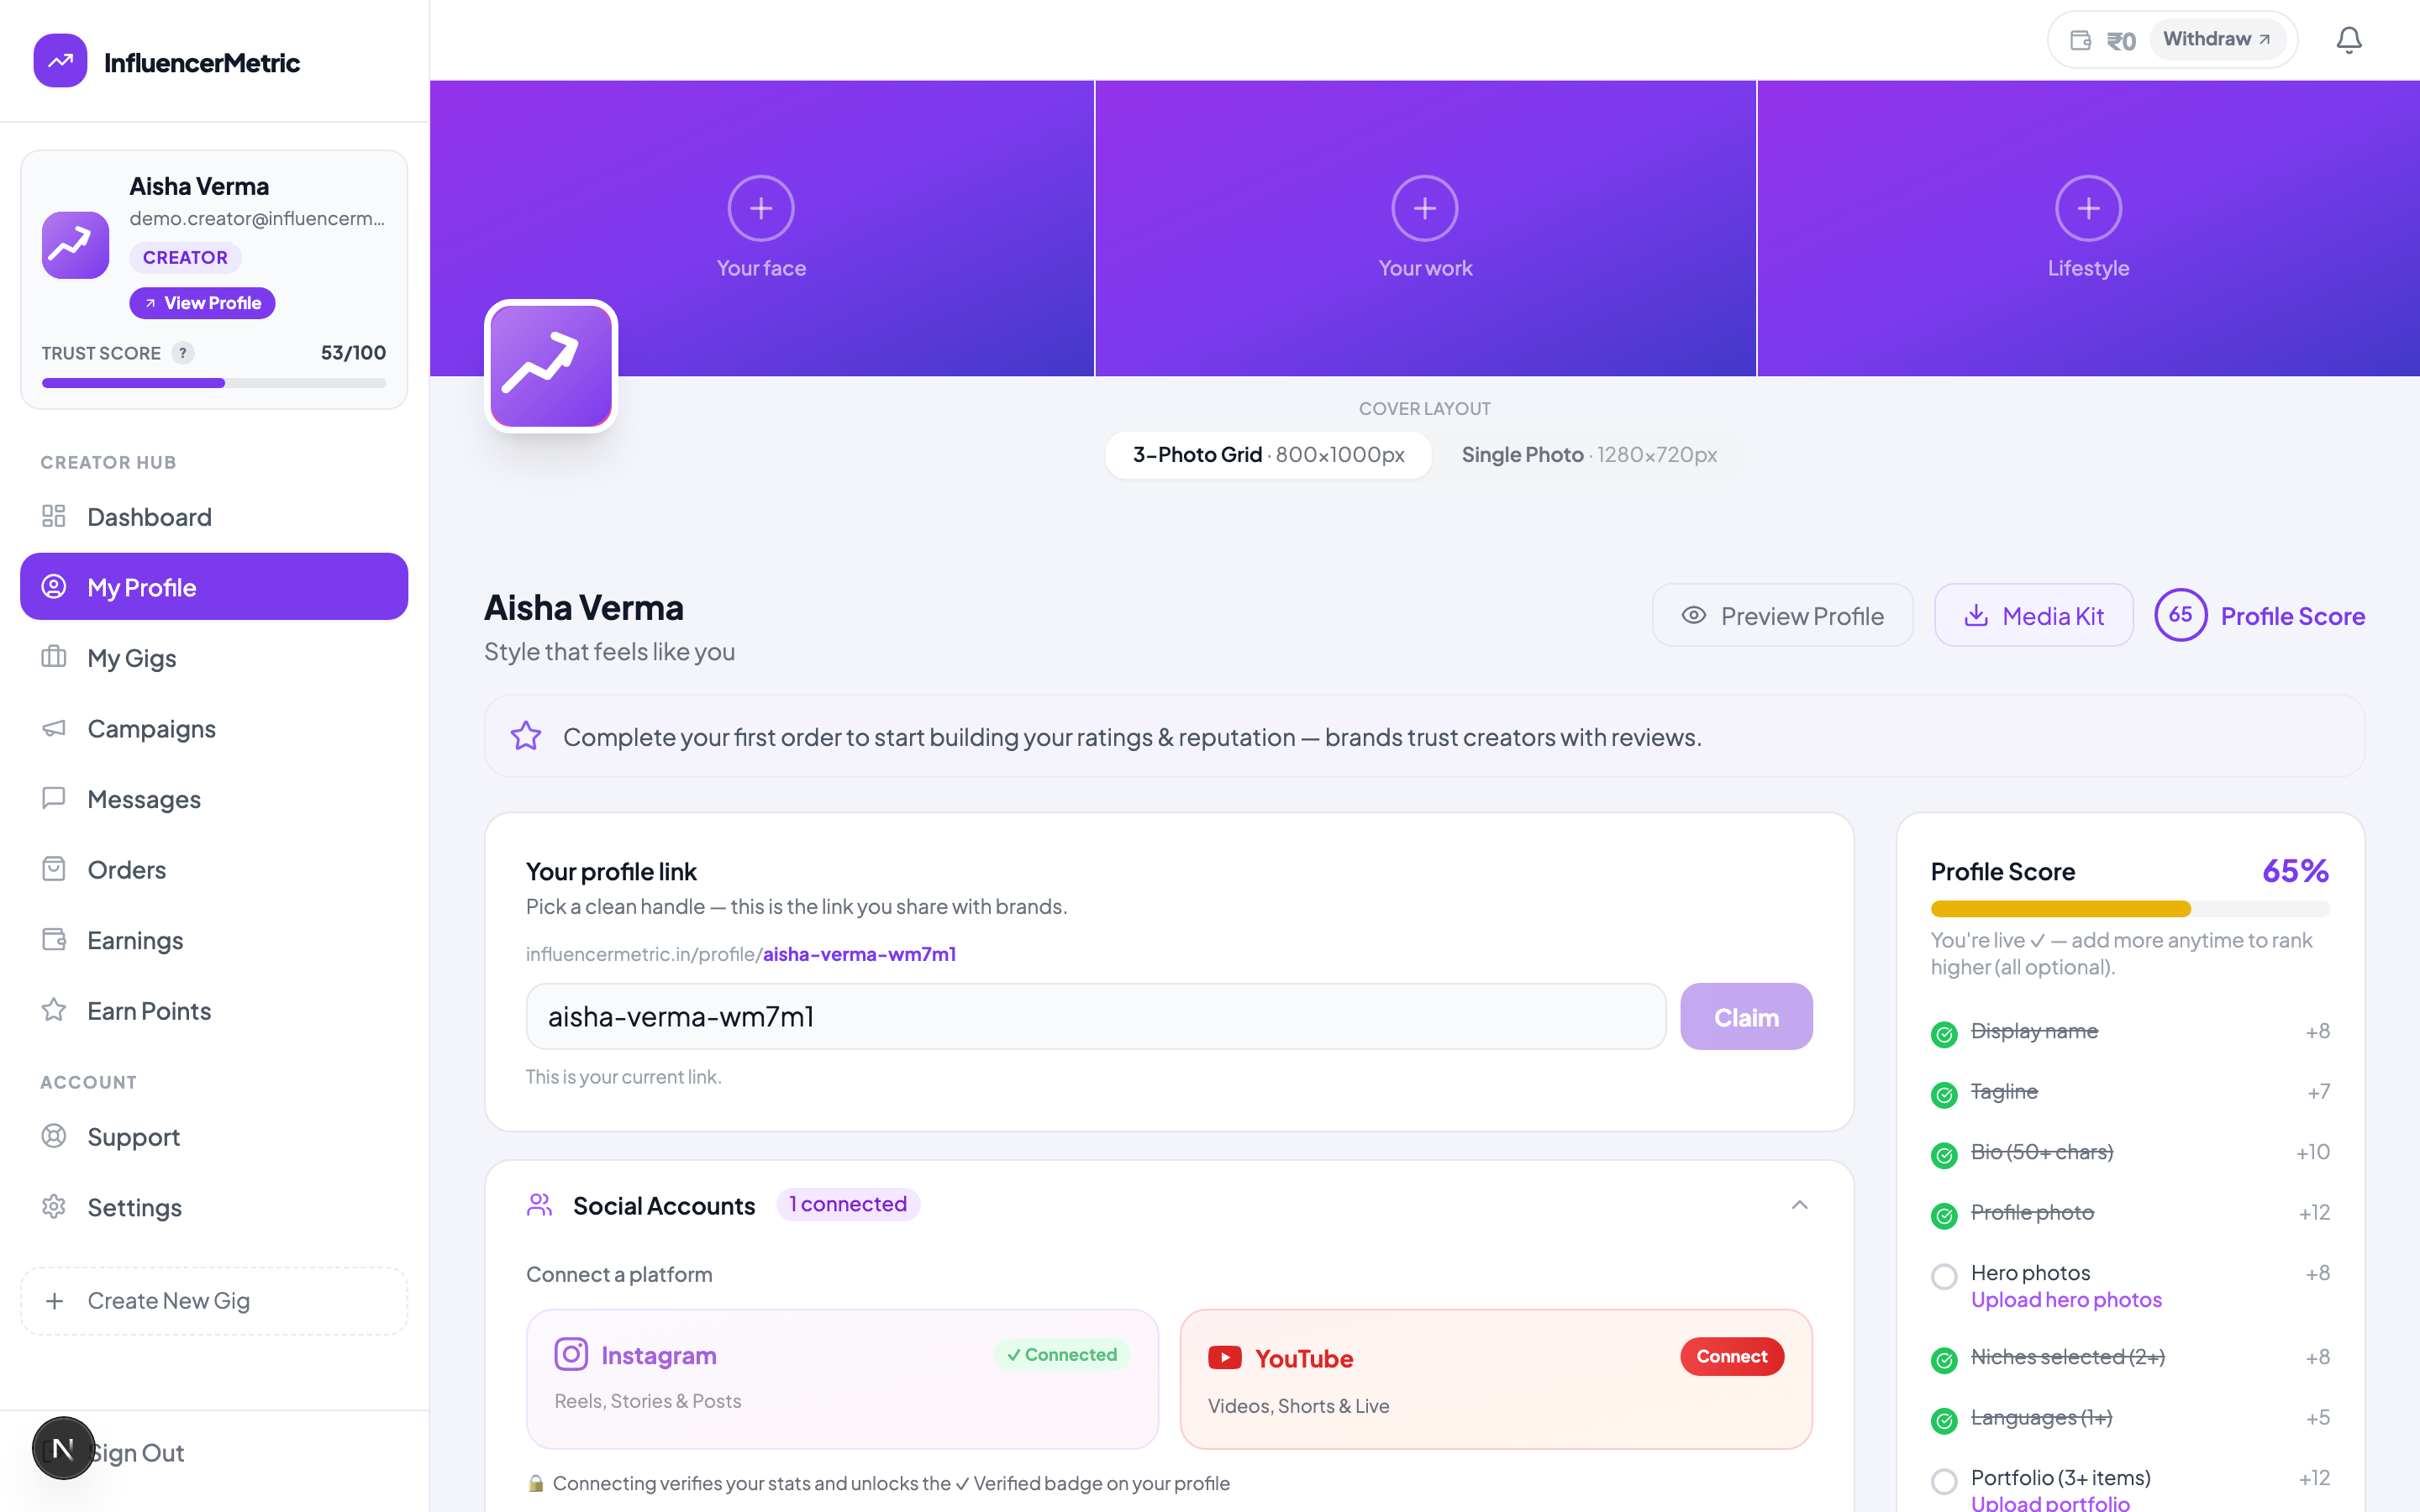
Open My Profile. Two things matter most on this screen:
- Your profile link. Claim a clean handle (like influencermetric.in/profile/aisha), this is the link you'll put in your Instagram bio and send to brands.
- Social Accounts. Connect Instagram or YouTube with one tap. Connecting pulls your real follower and engagement numbers straight from the platform and unlocks the ✓ Verified badge.
Why verification matters: you can also enter stats manually, but manual numbers are shown to brands with a "self-reported" label until a real connection confirms them. Verified numbers win shortlists, it's the single strongest trust signal on your profile.
Handles are first come, first served. Claim yours now and finish the rest of this guide inside your own dashboard.
Claim my free profileStep 4: Nail your visual identity
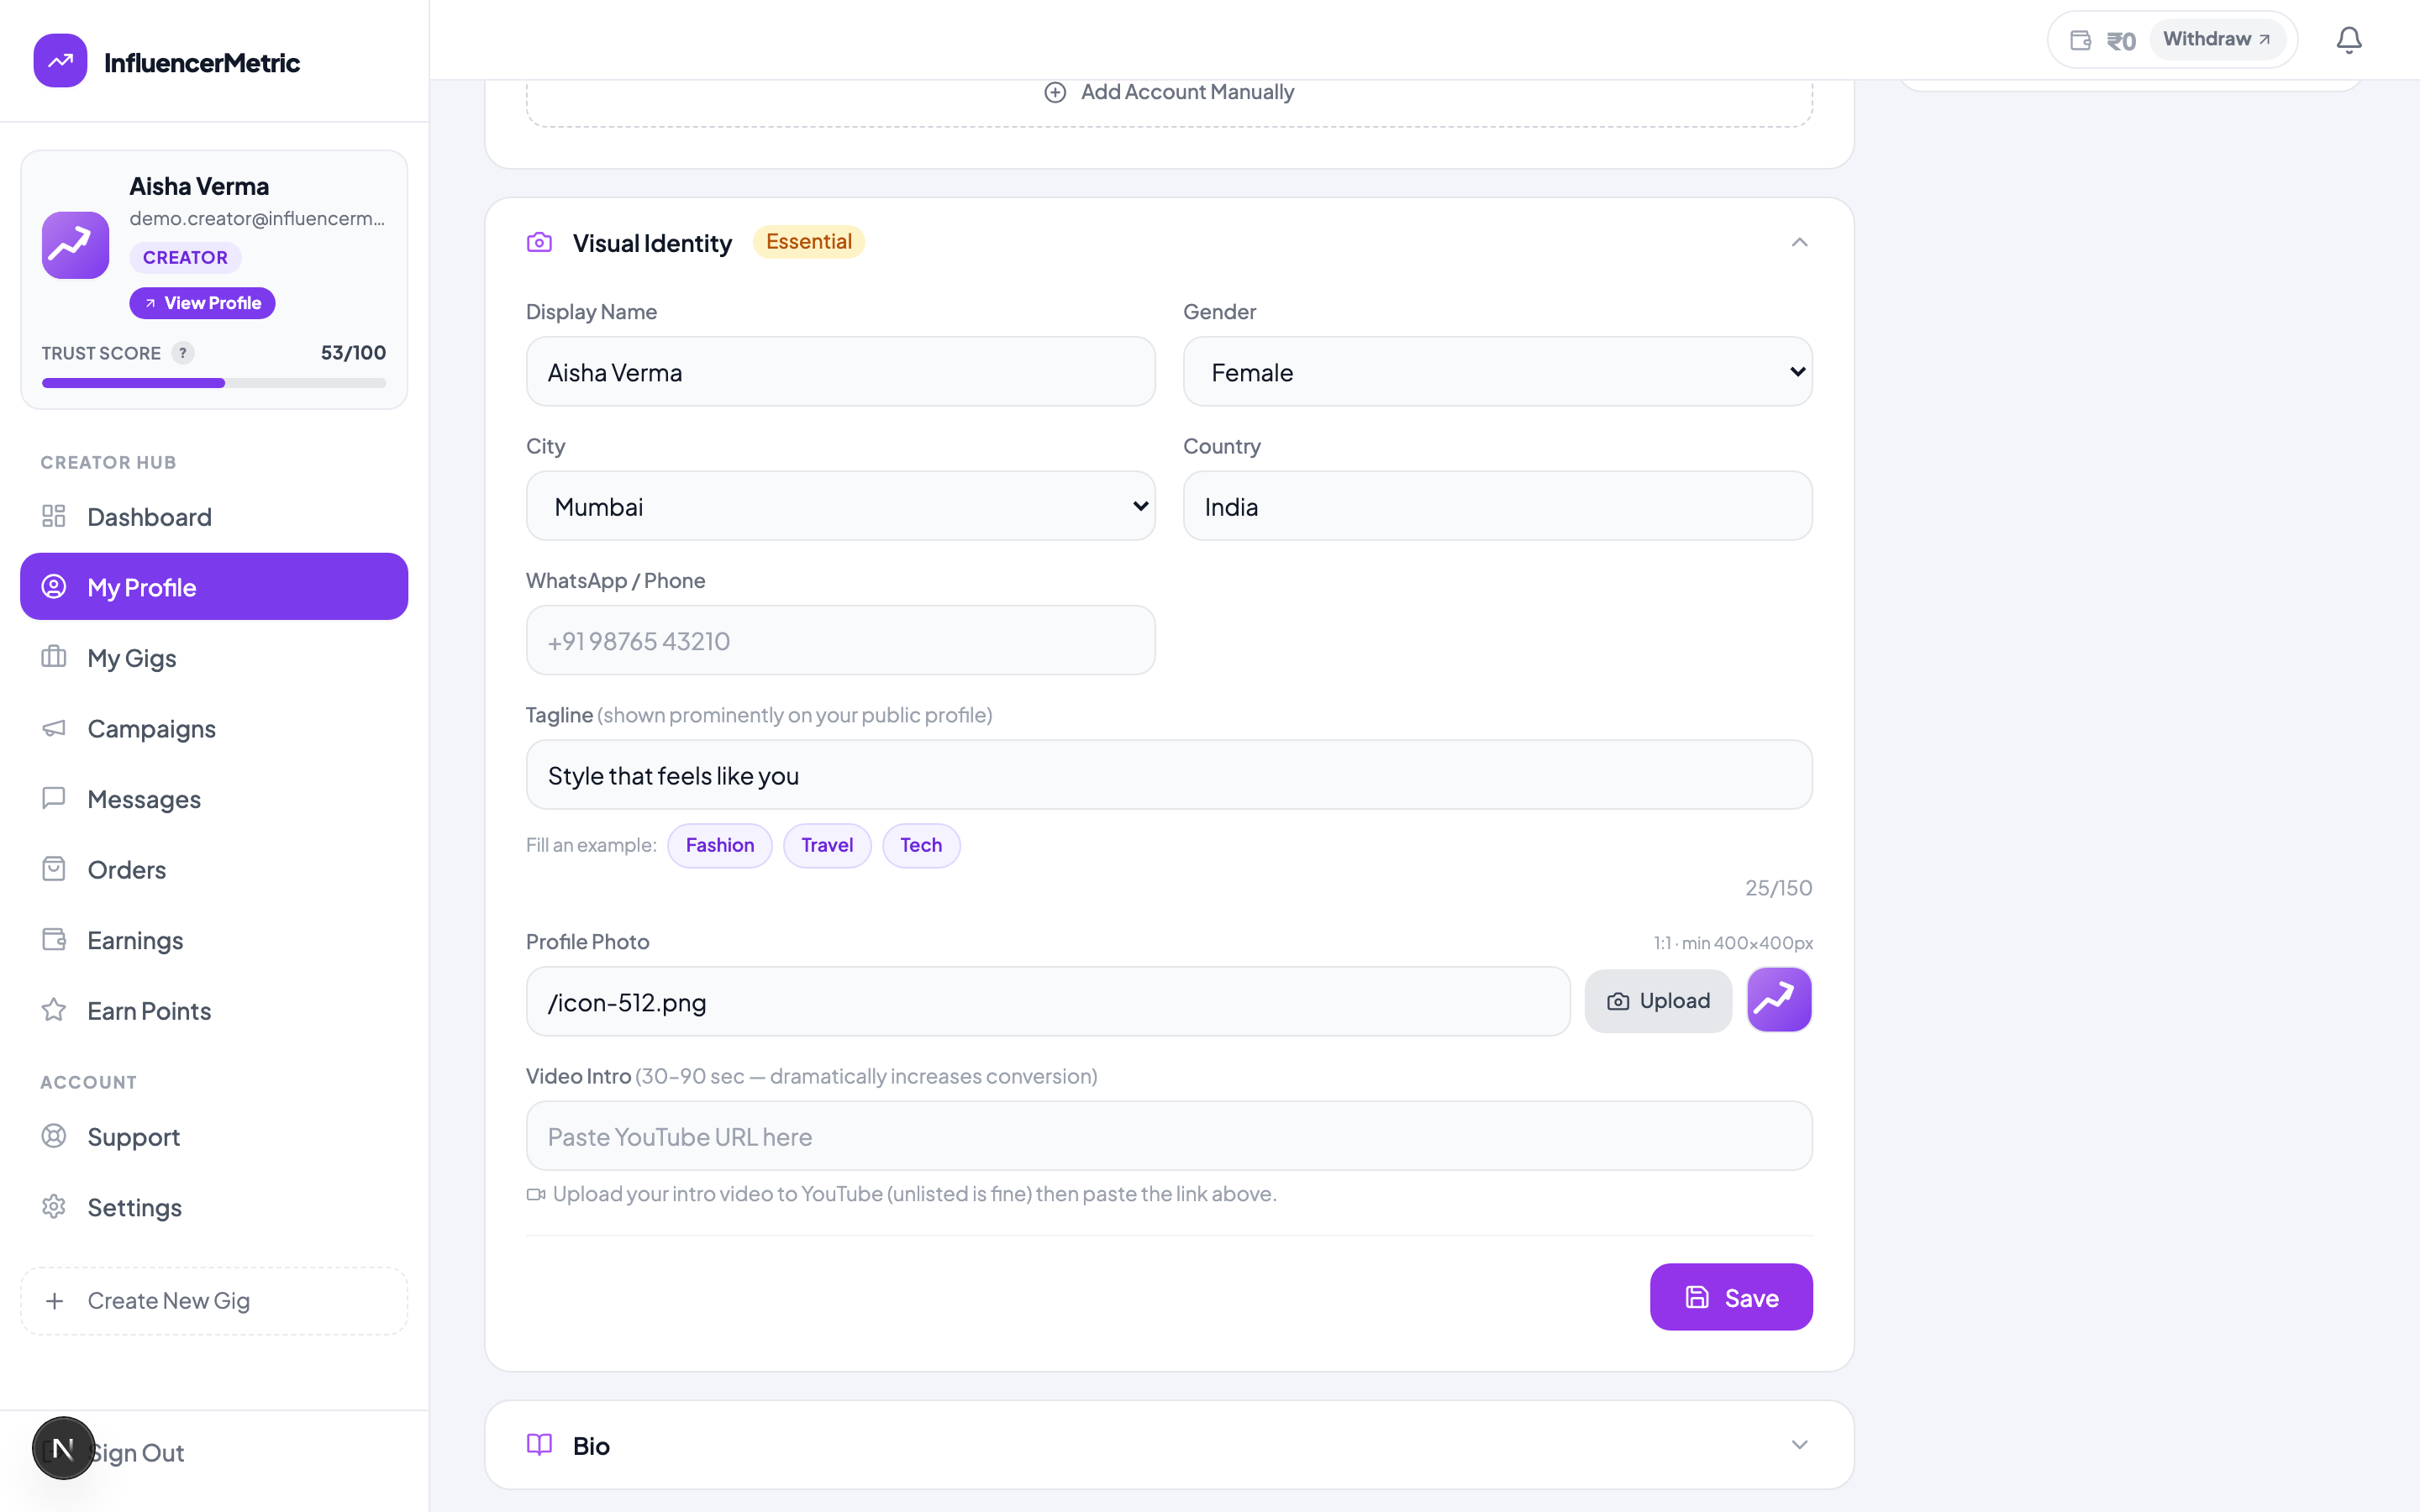
Scroll to Visual Identity and fill in:
- Display name: your real name or the name you're known by on Instagram. Keep it consistent across platforms.
- City: brands filter by city constantly (store visits, events, regional campaigns). A creator in Mumbai with a city set will appear in searches a nameless-city creator never will.
- Tagline: one line that says what you make. "Style that feels like you" beats "Content creator". You get 150 characters; use ten of them well.
- Profile photo: a clear, well-lit photo of your face, at least 400×400px. Profiles with real faces get dramatically more clicks than logos or graphics.
- Video intro: optional, but a 30–90 second intro (uploaded to YouTube, even unlisted) noticeably increases bookings. Brands hire people, not thumbnails.
Step 5: Write a bio that sells, pick your niches
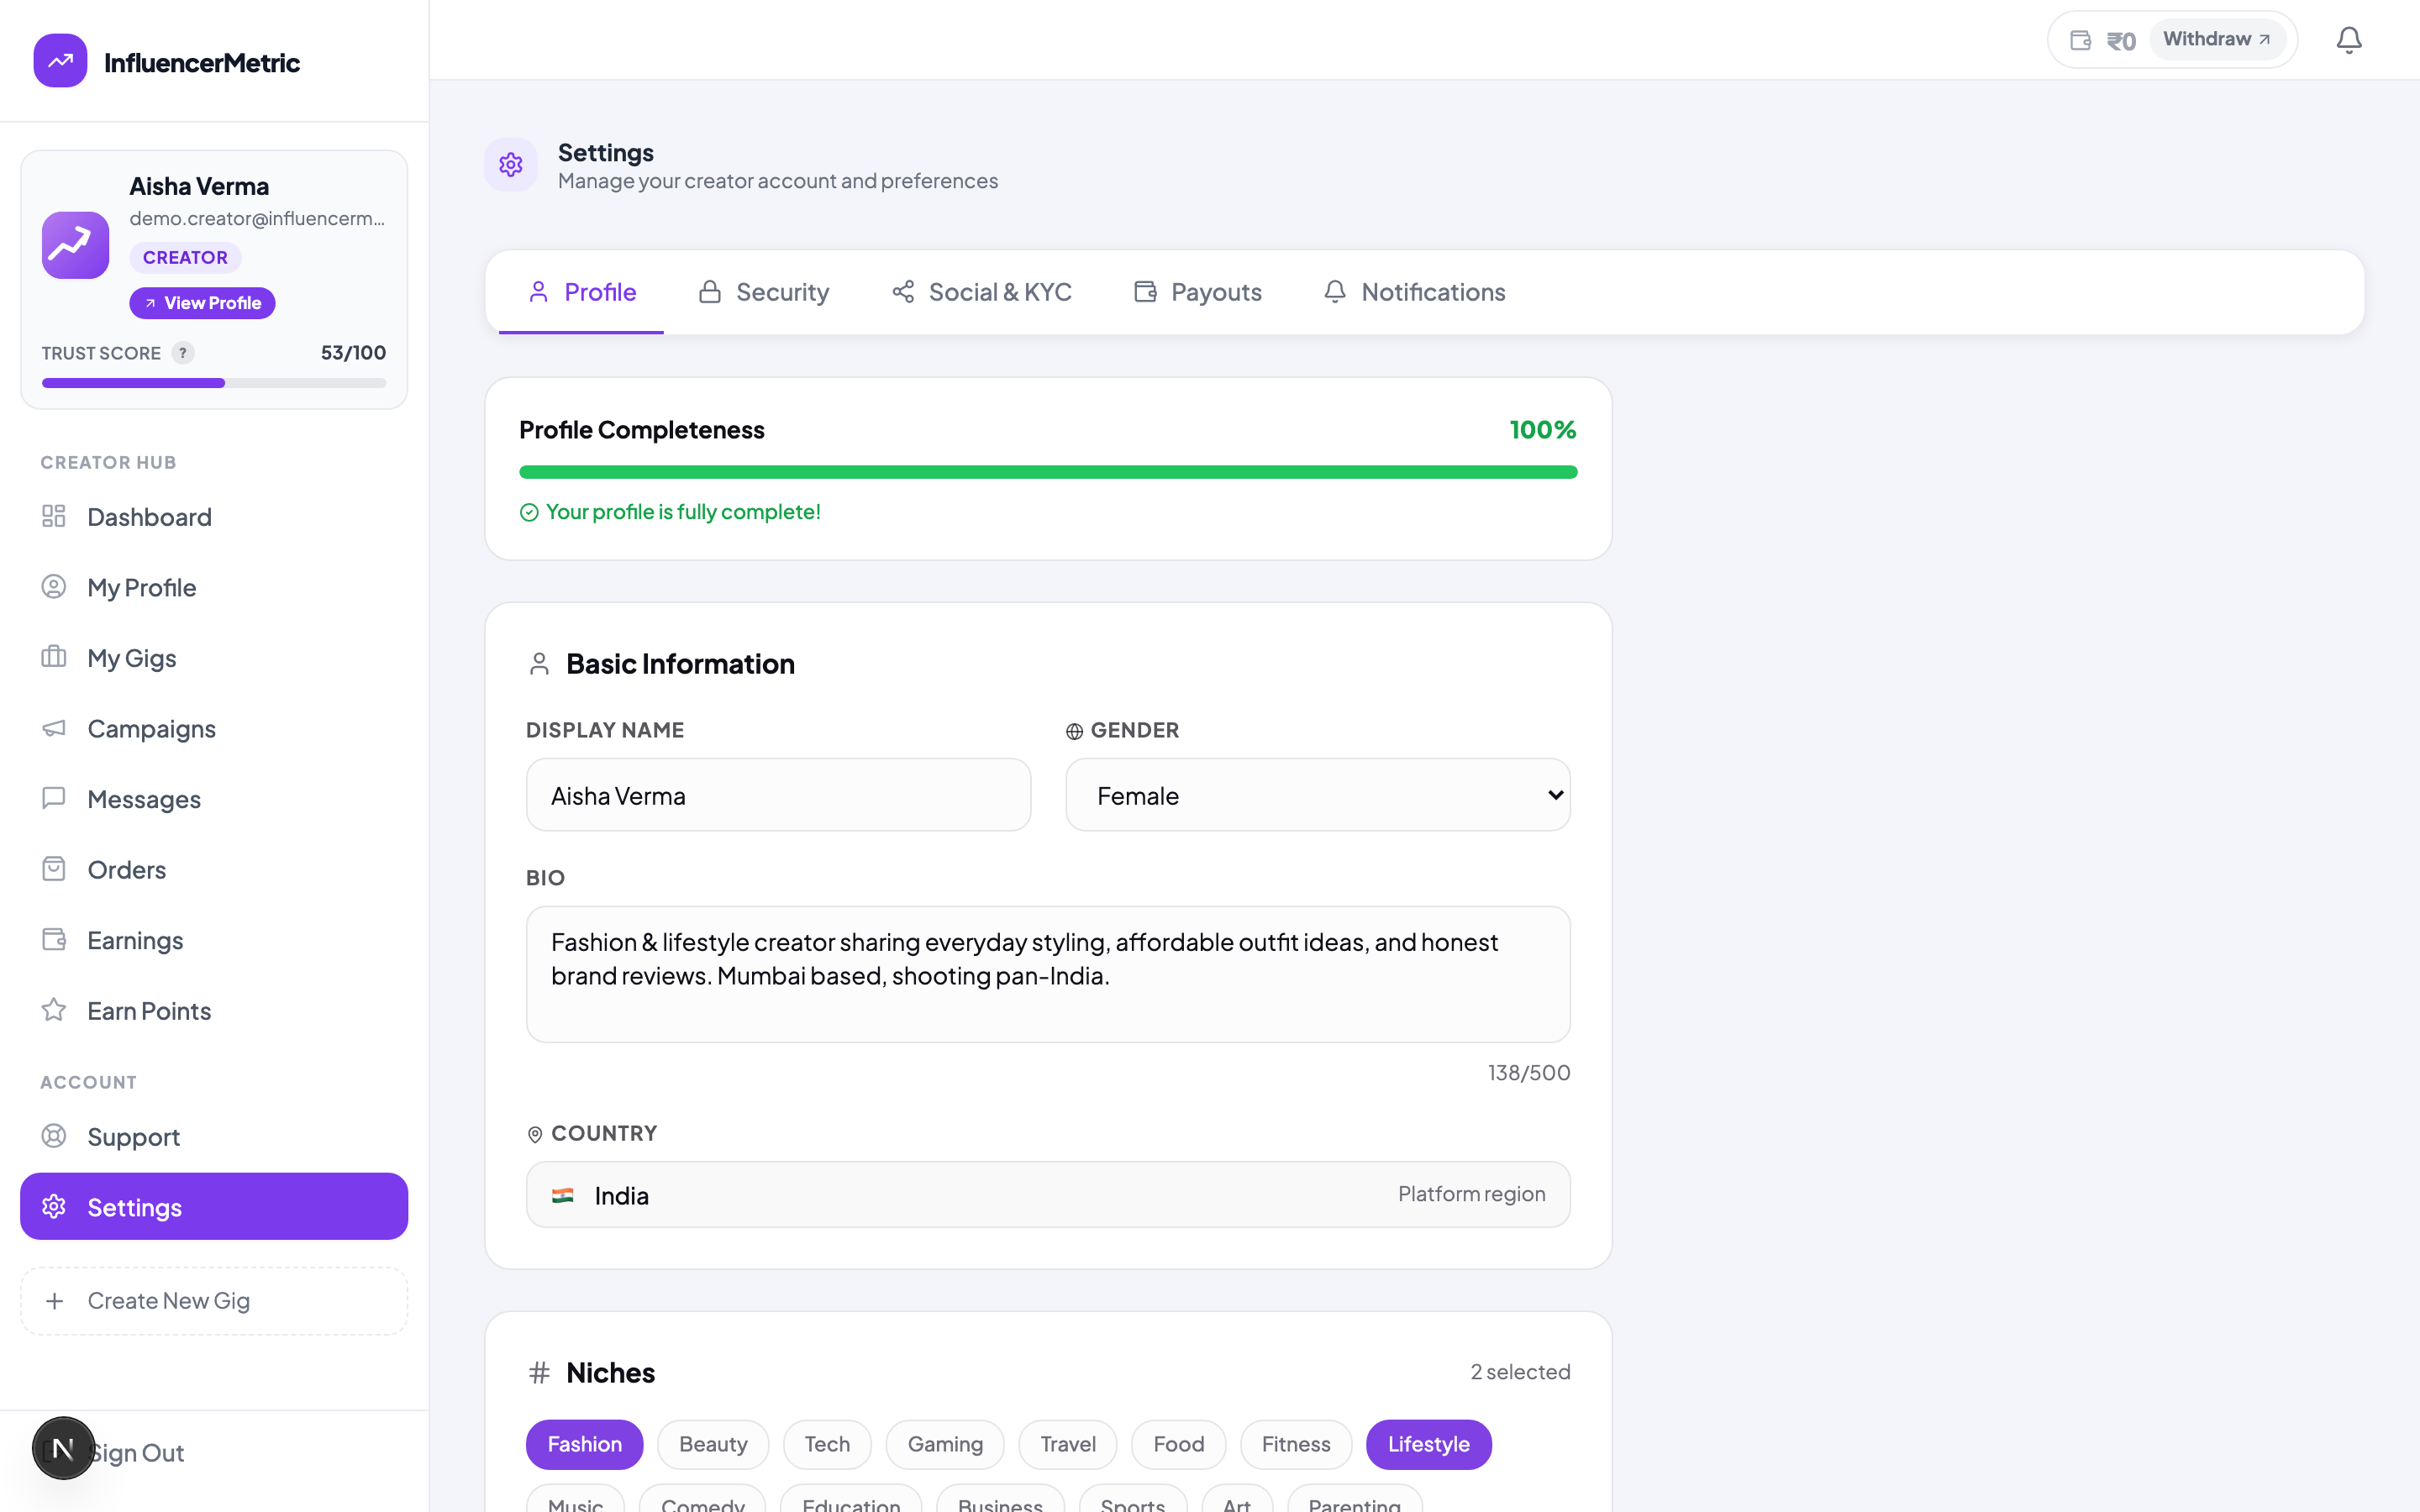
In Settings → Profile you'll find your bio, niches and languages. A formula that works:
What you create + who follows you + one line of proof.
"Fashion & lifestyle creator sharing affordable outfit ideas. Mumbai-based, audience of young working women. Brands I've worked with love my honest review format."
- Write at least 50 characters, short bios read as abandoned profiles.
- Pick at least two niches: brands search by niche, and each one you legitimately fit doubles your discovery surface.
- Add your languages. In India this is a genuine differentiator, a brand running a Hindi campaign filters for Hindi-speaking creators.
Step 6: Publish your first gig
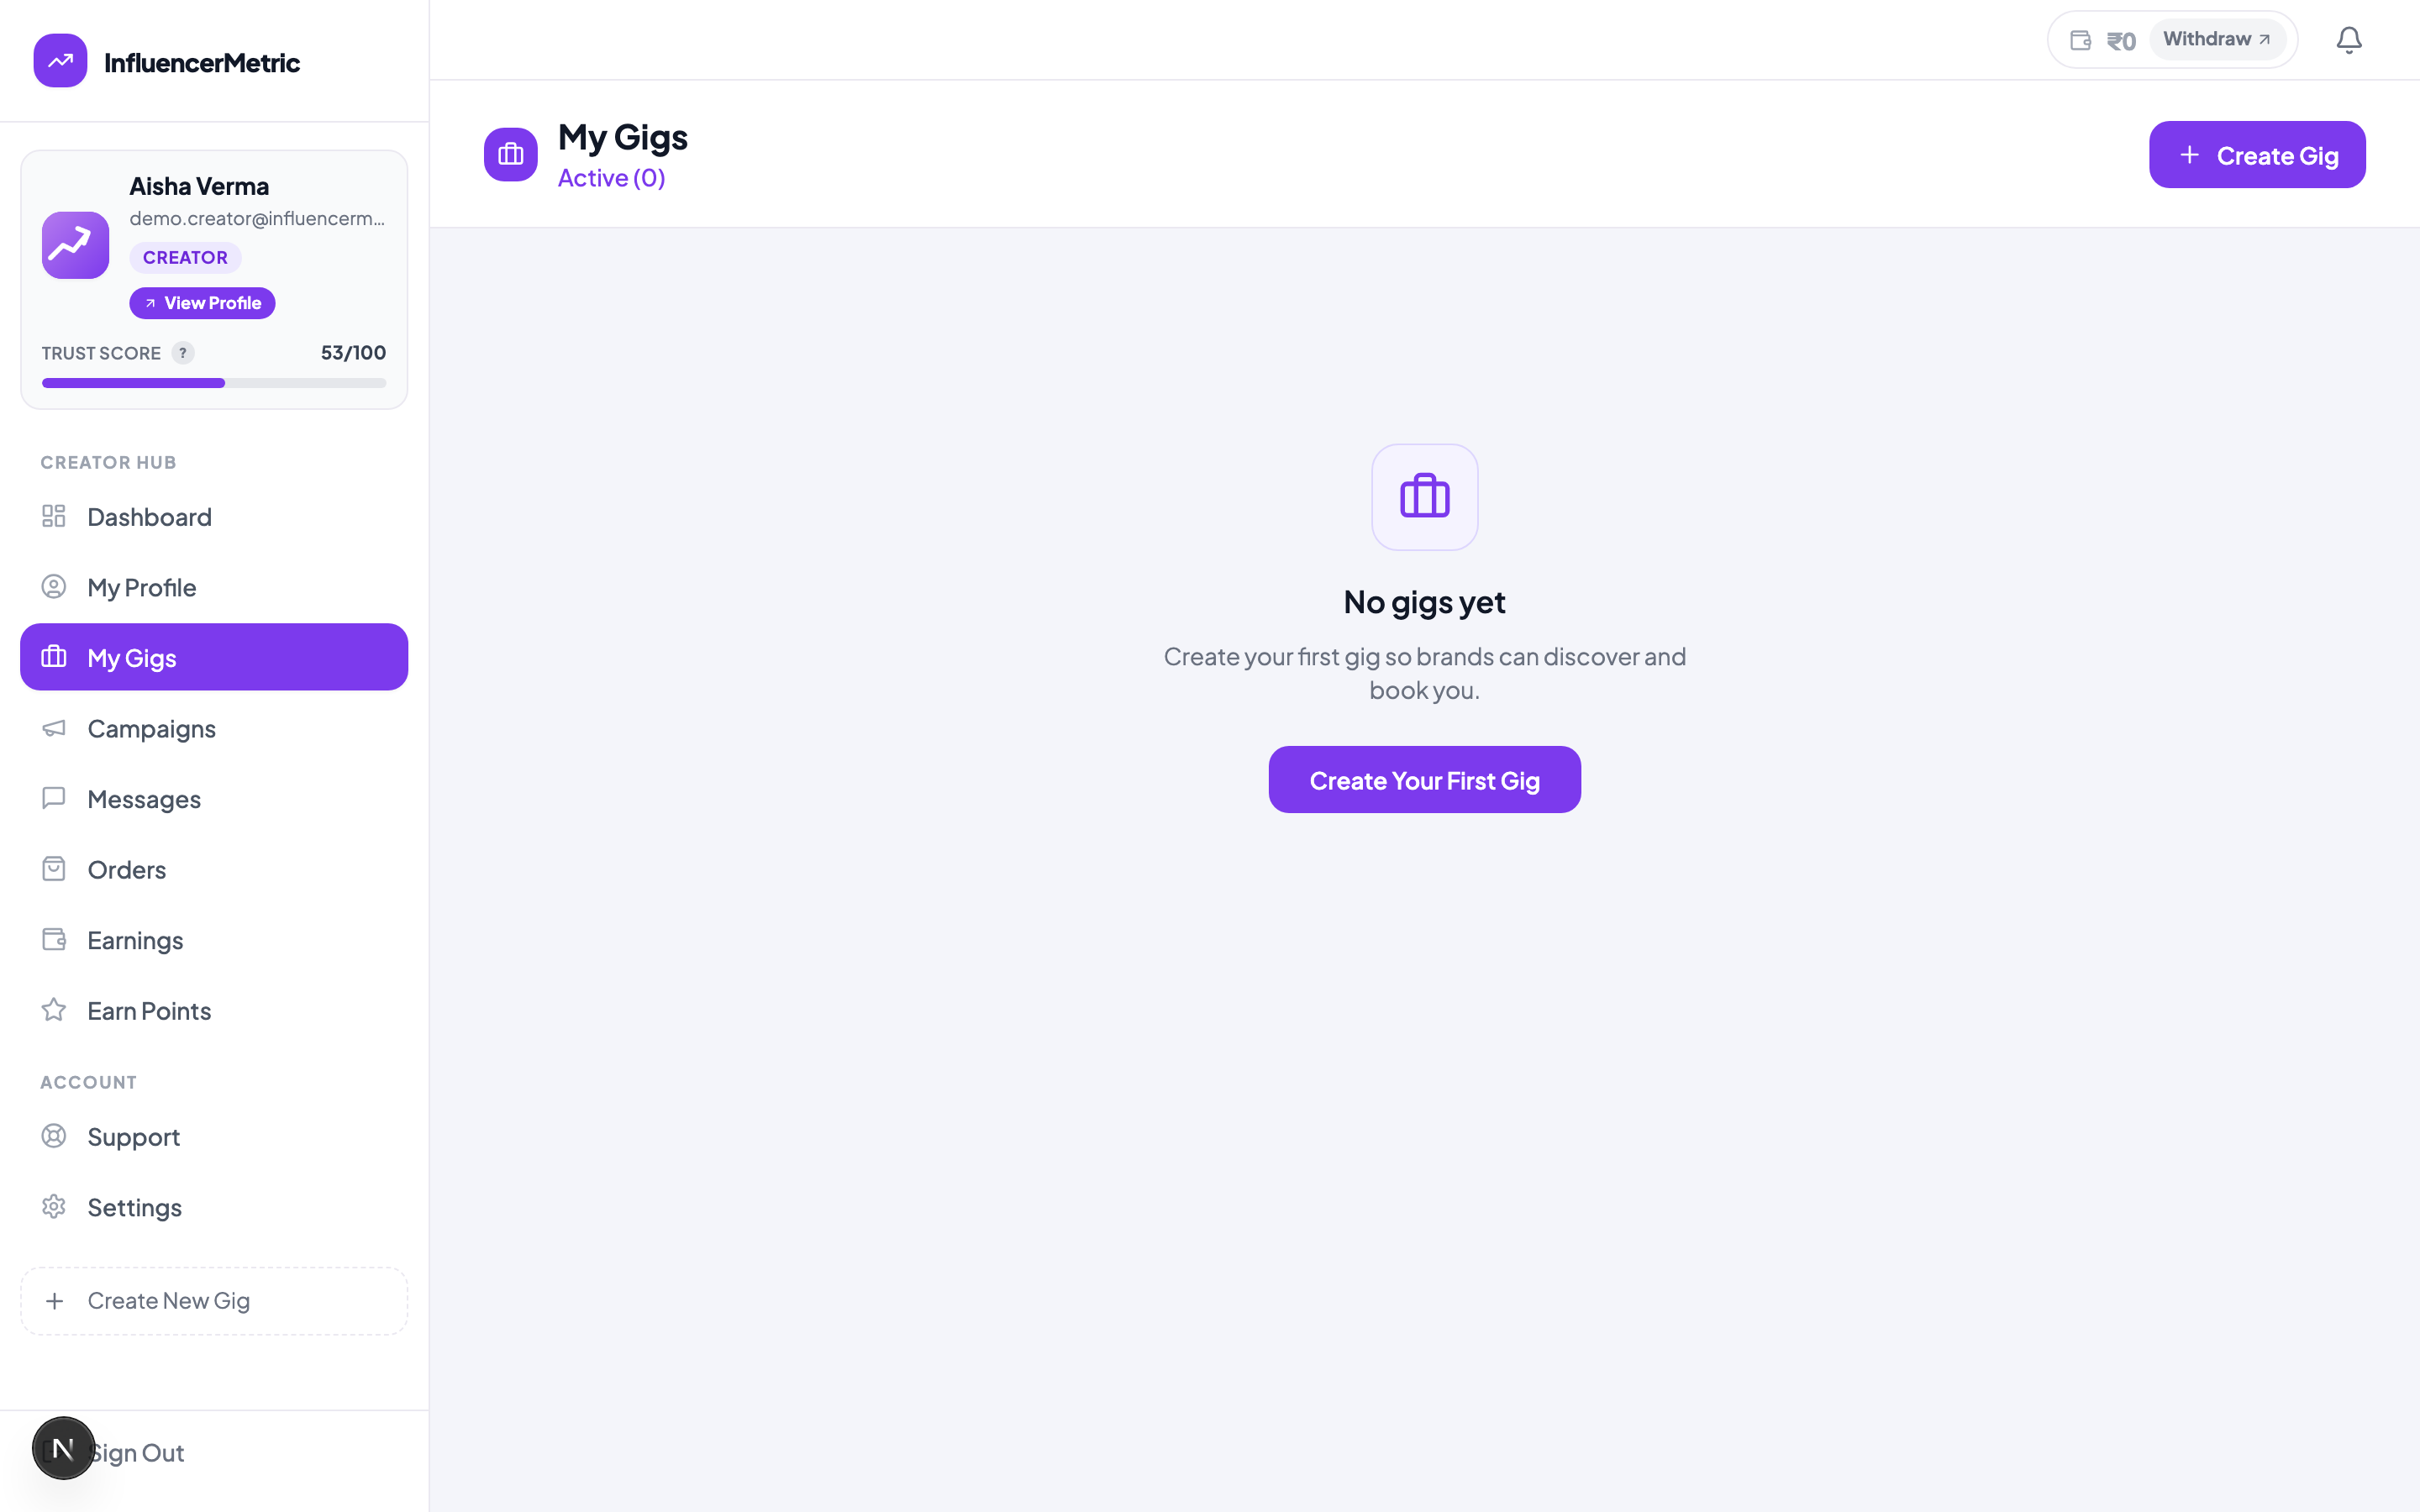
A profile tells brands who you are; a gig tells them what they can buy. Click Create Your First Gig and package your work, for example "1 Instagram Reel + 3 Stories". Clear packages with clear prices get booked; "DM for collab" does not.
Not sure what to charge? Our free Creator Pricing Calculator gives you a benchmark range for every deliverable based on your size, niche and engagement, and the Engagement Rate Calculator tells you the number brands will judge you on.
Step 7: Push your Profile Score to 100%
The Profile Score panel keeps track of everything: name, tagline, bio, photo, niches, languages, hero photos, portfolio. Each item shows its point value, so you always know the next highest-impact thing to add. Creators at 100% rank higher in brand search than creators at 60%, the meter isn't decoration, it's your ranking.
Step 8: Preview what brands actually see
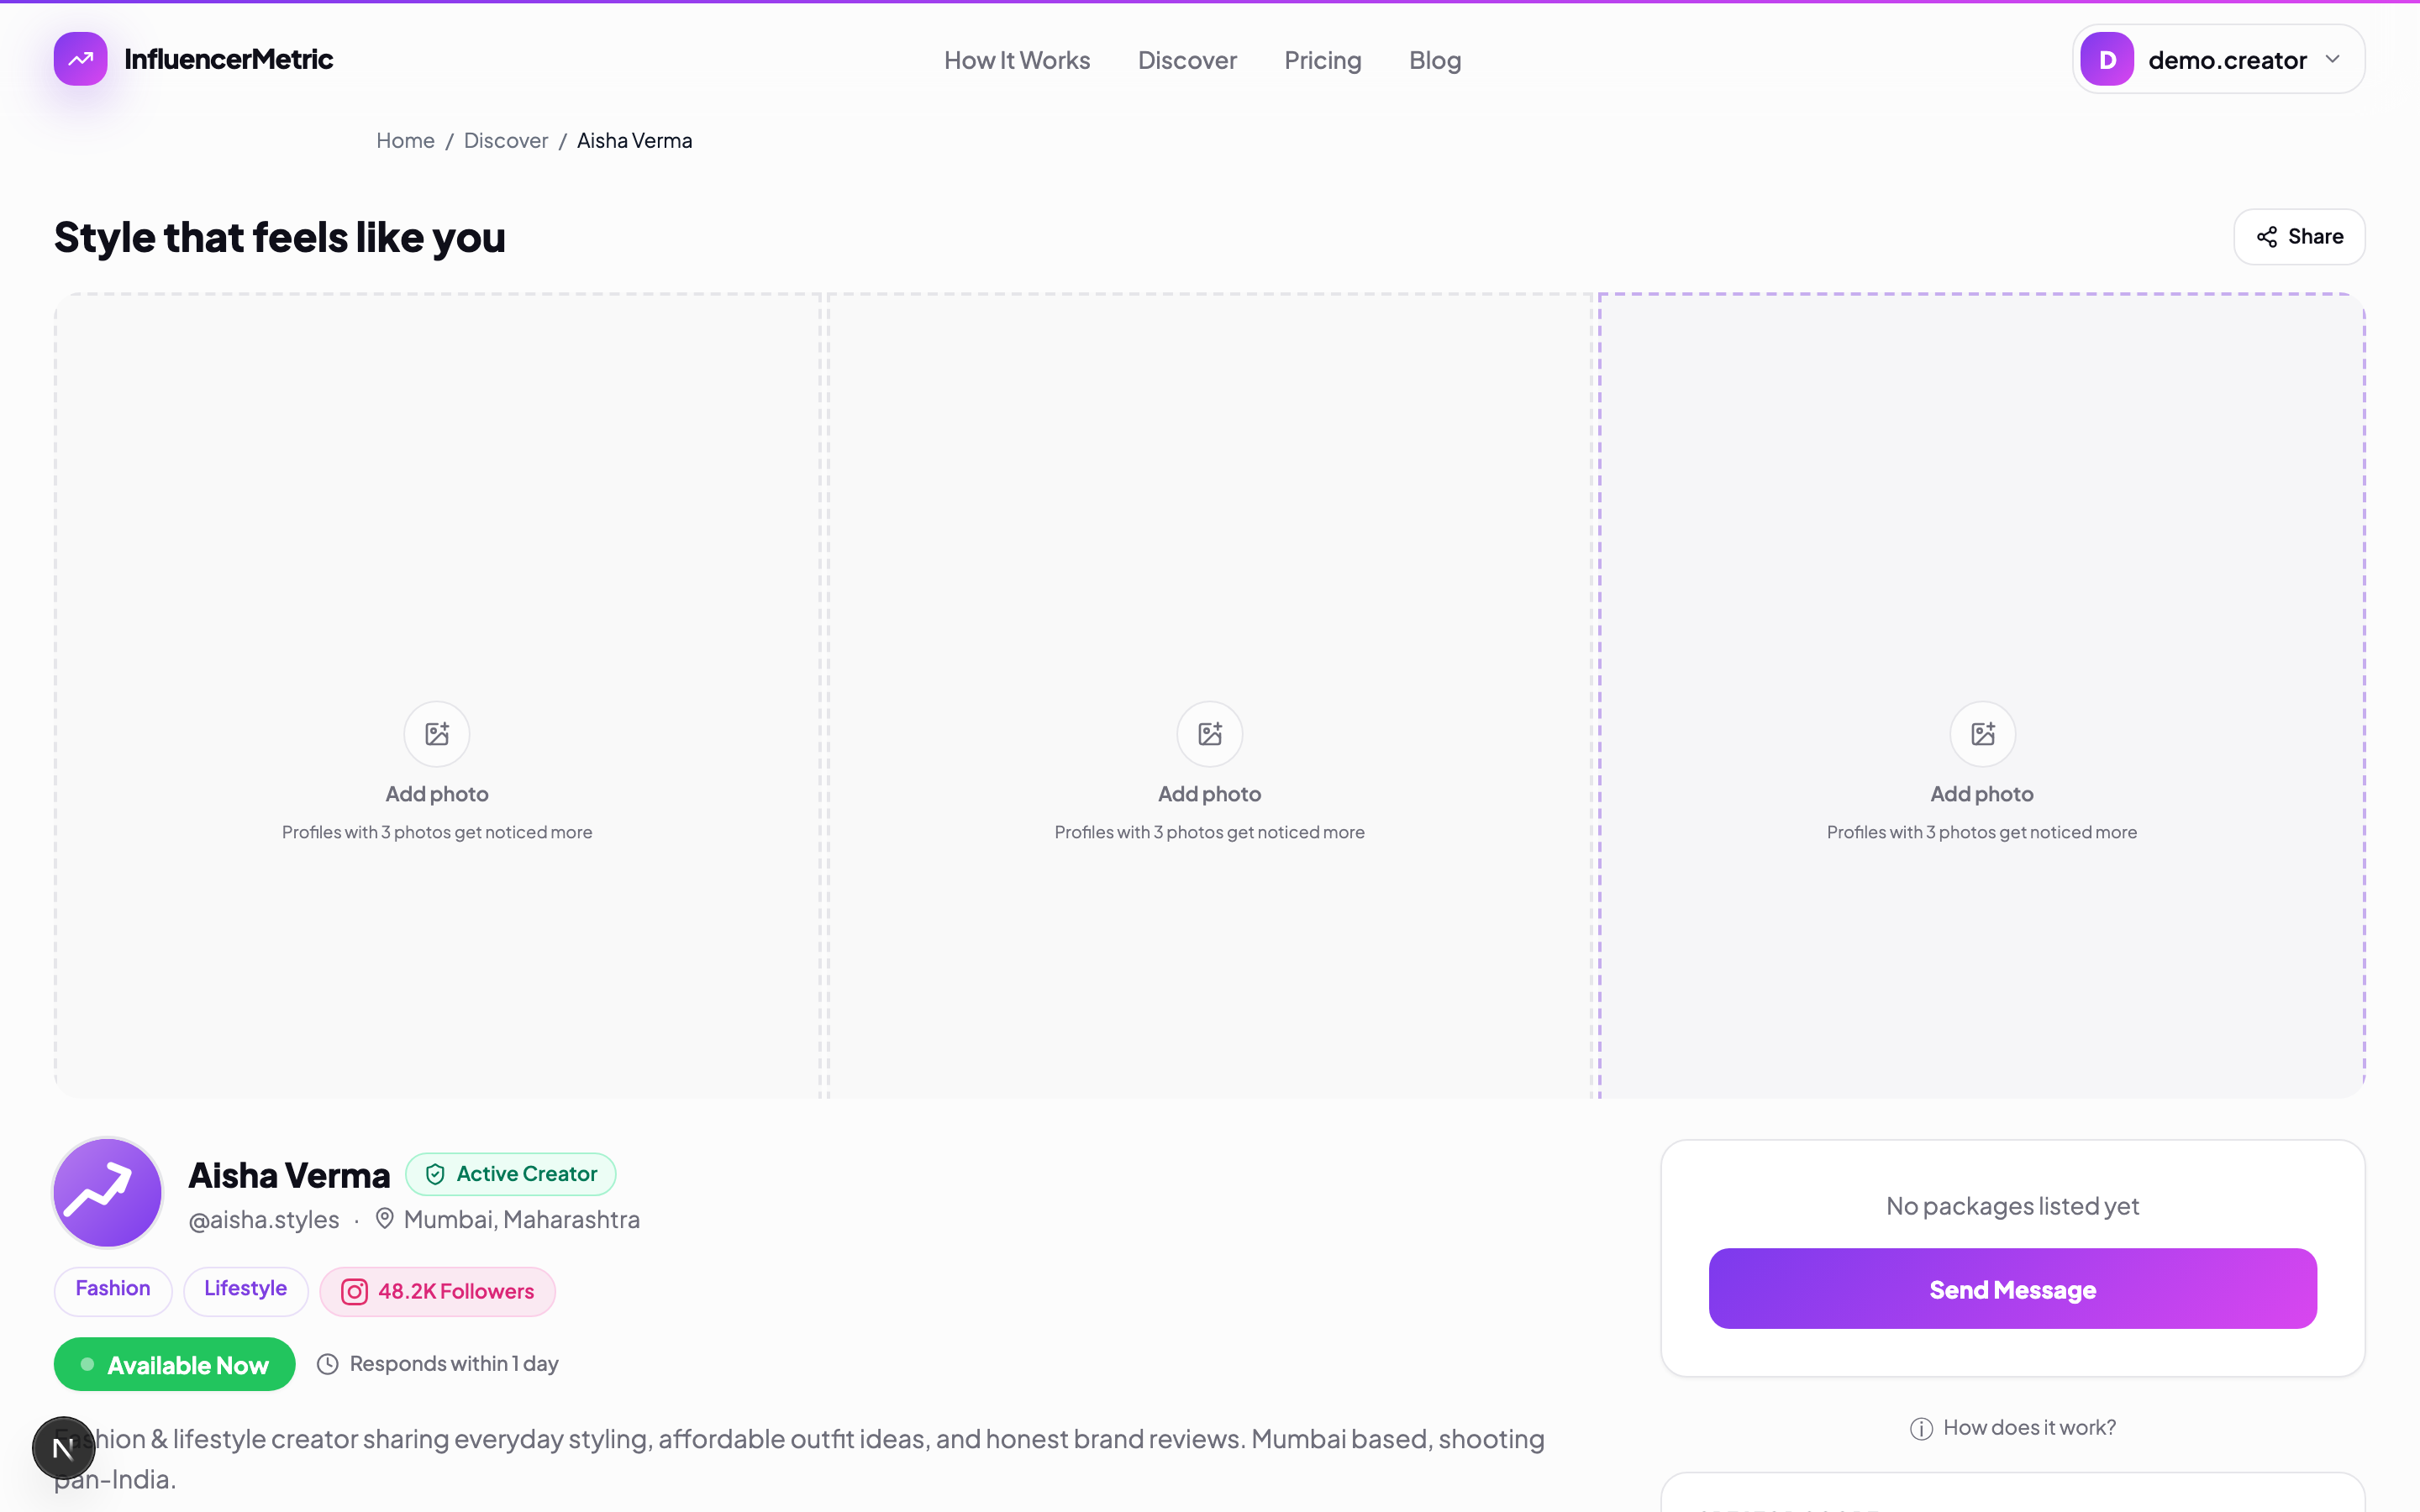
Hit Preview Profile and look at your page the way a brand does. The big thing to notice: the 3-photo hero grid at the top. Profiles with all three photos filled, your face, your work, your lifestyle, get noticed far more than profiles with empty frames. It's the first thing every visitor sees, before your stats, before your bio.
Happy with it? Put your profile link in your Instagram bio, your YouTube description, and your WhatsApp status. Every brand conversation you have anywhere can now end with one link.
The complete checklist
- ✅ Sign up free as a creator (2 minutes)
- ✅ Claim a clean profile link
- ✅ Connect Instagram or YouTube for the ✓ Verified badge
- ✅ Real name, city, sharp tagline, clear face photo
- ✅ 50+ character bio with proof, 2+ niches, languages
- ✅ First gig published with a clear package and price
- ✅ Profile Score at 100%, all 3 hero photos filled
- ✅ Link in your Instagram bio
Do this once, properly, and your profile works for you around the clock, every brand that searches your niche and city finds a page built to convert.
Related: How to Make an Influencer Media Kit in 2026 (Free Guide), InfluencerMetric iOS App Is Live, Free on the App Store.